Autoresponders
Autoresponder is a mailbox attribute. Whenever a message
arrives in a mailbox, the system immediately sends a custom
response back to the sender.
To Setup autoresponders follow these steps.
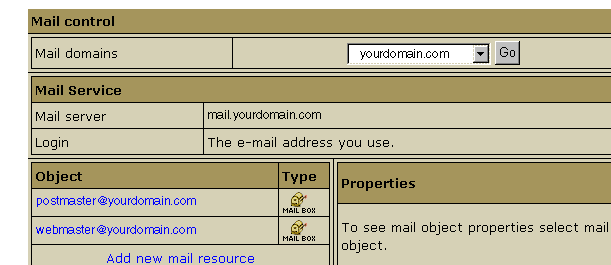
Step 1. From your Control Panel
Select Mail Info on the left side menu.
Step 2. At the bottom of the page that appears,
click Add new mail resource:
Step 3. Choose Autoresponder from the drop-down
menu and then click Next :

Step 4. Configure desired Autoresponder settings.
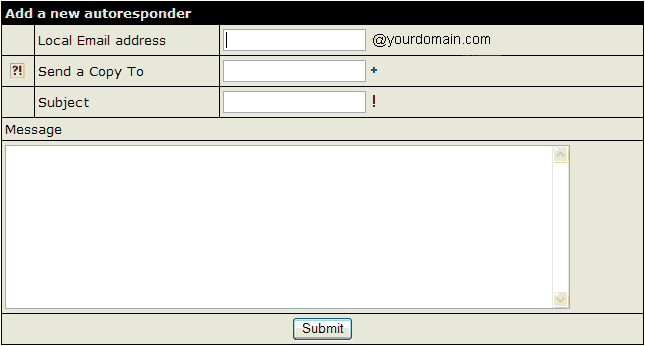
Local Email Address: Specify the Mailbox you want
to set-up a autoresponder for.
Send a Copy To: the optional e-mail address to which copies
of response messages will be e-mailed.
Subject: the subject of the response
message, e.g. receipt confirmation.
Message: the body of the response
message, e.g. Your message was received. Thank you.
back to Email
Setup
back
to Support Center
home